I read a bunch of tutorials, and the thing that bugged me is that none of them really looked professional in how they were wired (most weren't wired at all) and mounted. That kind of thing doesn't fly with me. See, I love DIY, but I hate it when my DIY projects look DIY. I want things to look professional. So, what you are about to read is the ultimate DIY faux shell chandelier project. Here are a couple pictures of the end result:


In part 1 I'll focus on making the shells and getting them ready to hang onto your chandelier base. In future parts I'll talk about getting the base set up and wired and finally, installed. So, let's get started.
For the shells themselves you will need:
- Wax paper
- Iron
- Parchment paper
- Iridescent paint
- Paper cutter
- Jump rings in the metal finish of your choice (I used black)
- Hole punch
- 2 pairs of pliers
I started by cutting sheets of paper about 18" long. I cut an entire box worth of wax paper into sheets. I used my paper slicer (picture below) to make the cuts clean. I was not worried about the sheets being exactly the same length so I just positioned my paper cutter about 18" from the edge of the counter top and pulled the paper to the edge to measure it.

I bought that paper cutter from Amazon (it's Swingline brand). I felt like it was a big expense when I bought it, but I use it ALL the time. In fact, I was using it earlier today on a totally different project. If you're at all crafty, I highly recommend buying a paper slicer like that.
After I had sheets that were about 18" long I ironed 4 sheets of paper together. I did this on my kitchen counter (which is stone, don't do this on a laminate counter top!). I placed a sheet of parchment down, then my 4 sheets of wax paper and another sheet of parchment. I started in the middle and pushed out toward the edges when I was ironing in order to push out any air bubbles between the sheets.
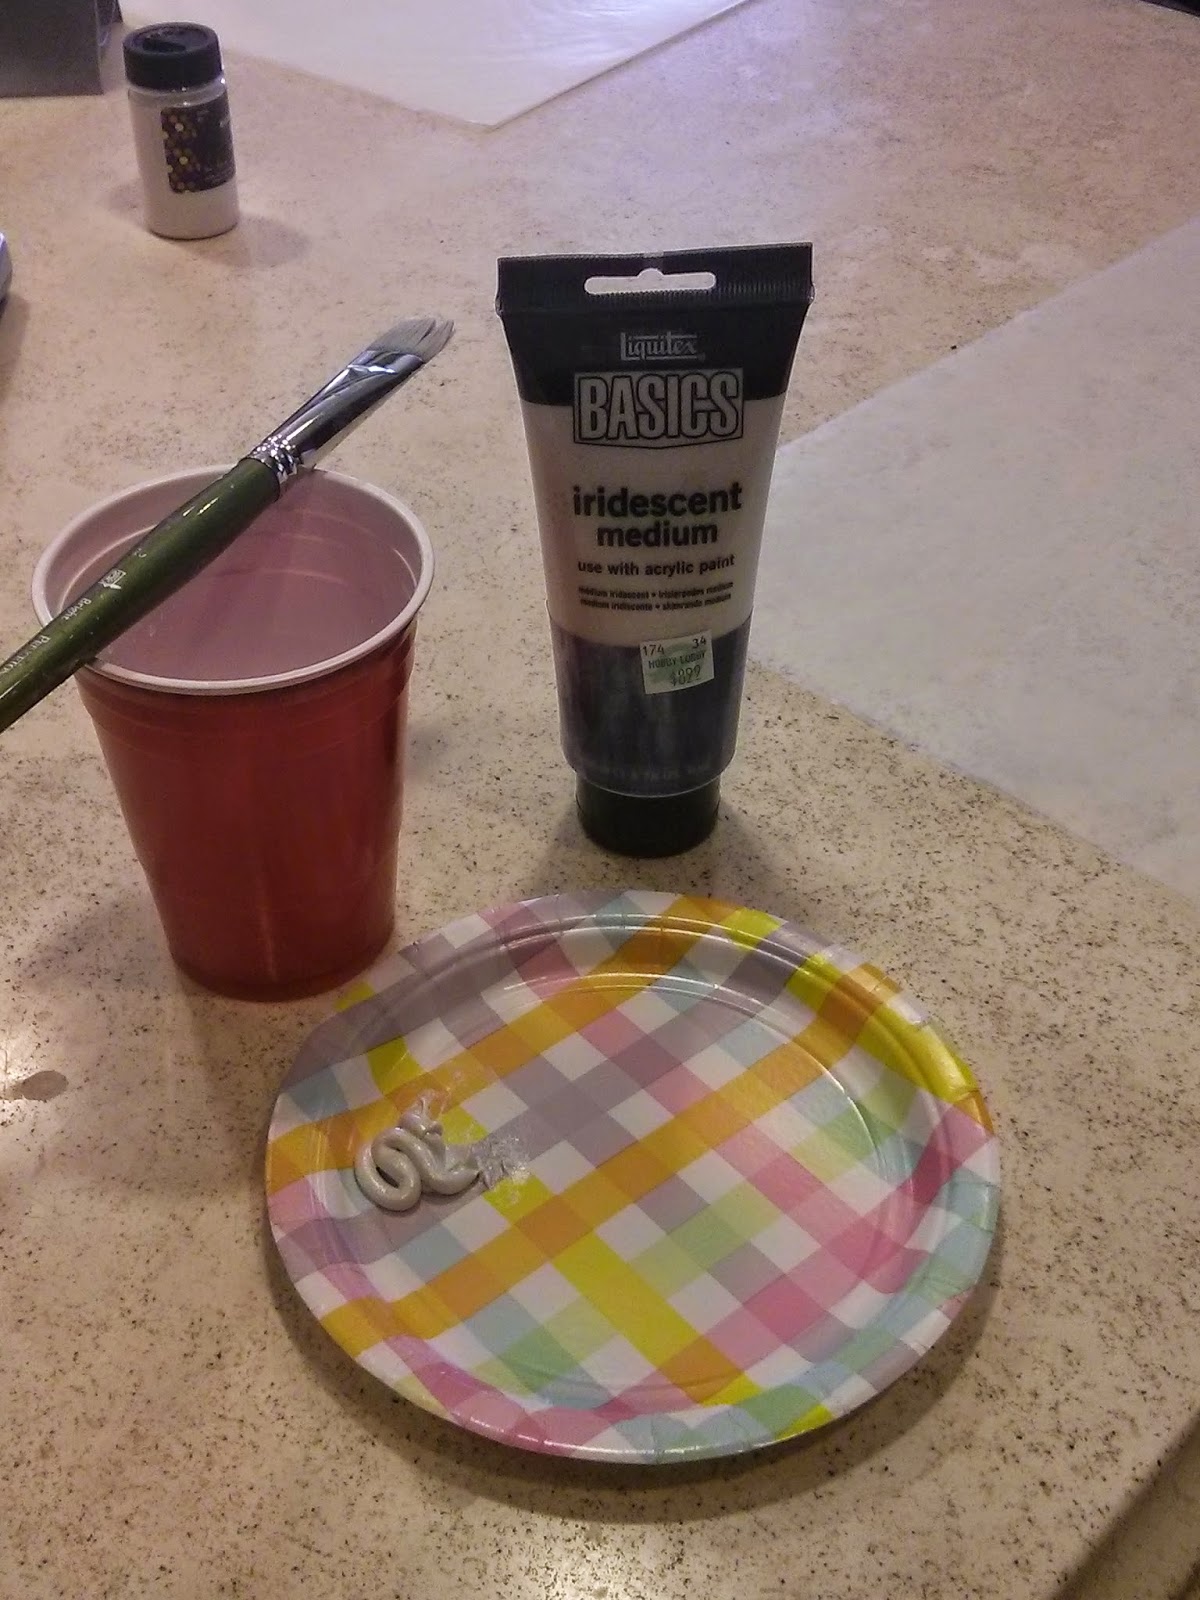
Once I had all of the sheets from the first box ironed together I painted them with iridescent paint. This is something I haven't seen mentioned in any of the tutorials I read, but it really makes the paper look like shells. This is the paint I used (from Hobby Lobby):

I didn't worry too much about the paint being uniform on the sheet or anything, since I figure the randomness would make the shells seem more real. Also, in case you're wondering, I tried a couple other things to try and achieve an iridescent finish (like the glitter in the background here). This paint was the best thing I came up with.
Once the sheets were dry, I cut them with my paper slicer. I cut the sheets into strips that were 2.5" wide and then cut them into individual pieces that were 1.25" wide by 2.5" high. Once I had a ton of those cut (I had to cut 24 pages worth, I think) I punched holes. I used a 1/16" hole punch.
I didn't want to punch holes in the shells if the holes weren't needed. So, for the last shell in each strand I only needed a hole punched on one end instead of at both ends. In order to figure out how many shells needed only a single hole punched I had to do some math...
I didn't want to punch holes in the shells if the holes weren't needed. So, for the last shell in each strand I only needed a hole punched on one end instead of at both ends. In order to figure out how many shells needed only a single hole punched I had to do some math...
I decided to make the longest layer 7 shells long, the middle layer 6 shells long, and the top layer 5 shells long. I did some rough math to figure out how many strands I would need by measuring the circumference of the metal basket at each level and dividing by 1" (allowing for 1/8" overlap on each side). So, because the top of the basket (the widest layer) was 98" around (33" + 33" + 16" + 16" = 98") I figured I would need approximately 98 strands and 98 shells with single holes for that layer. I did the same math for the other layers.
Note: In reality, I didn't end up using quite that many strands; I pretty much subtracted 10 from each of those numbers in the end. I believe I ended up needing 88 strands for the top layer, 82 for the middle layer and 78 for the bottom layer, something like that. So, you may want to stop a little short of making all the strands you think you'll need and re-assess once you actually get to assembling the chandelier.
For assembling the strands you'll need your pliers to open and close the jump rings. I got my jump rings at Michael's in the iron color to coordinate with the bronze finish of the rest of the hardware. I ended up buying 9 boxes of jump rings thinking that I was way over-buying, but it turned out that I used all of them:

So, basically, once you have holes punched in the shells, you start hooking them together with the jump rings. Actually, the jump ring packaging has a pretty good image of what I was doing. First you open the ring with the pliers, then add 2 shells face to face or back to back (assuming you only painted one side, which is what I did), then close the ring. You will want to make sure the ends of the jump ring are touching because the paper is thin and if there is any space it can slip out.
Once you have your strands made it's time to attach them to the hardware, which I'll cover in upcoming parts, so stay tuned for Part 2!
No comments:
Post a Comment